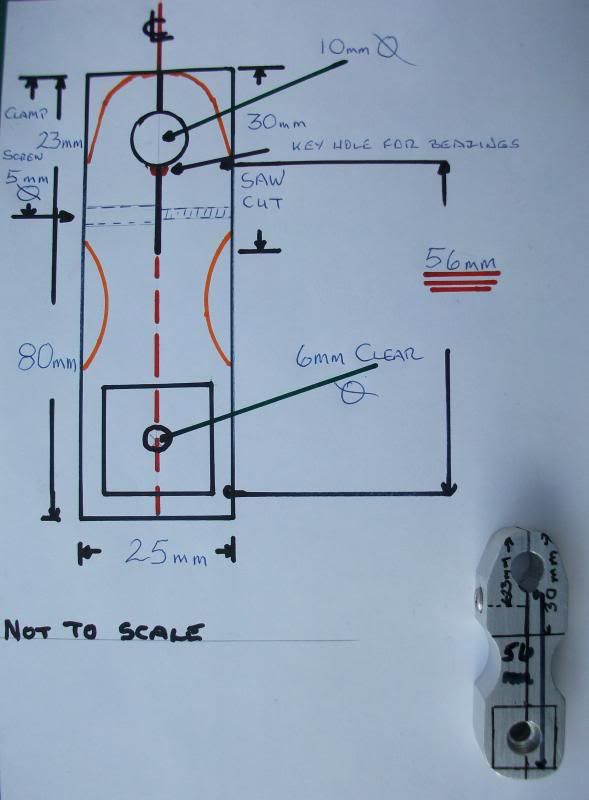
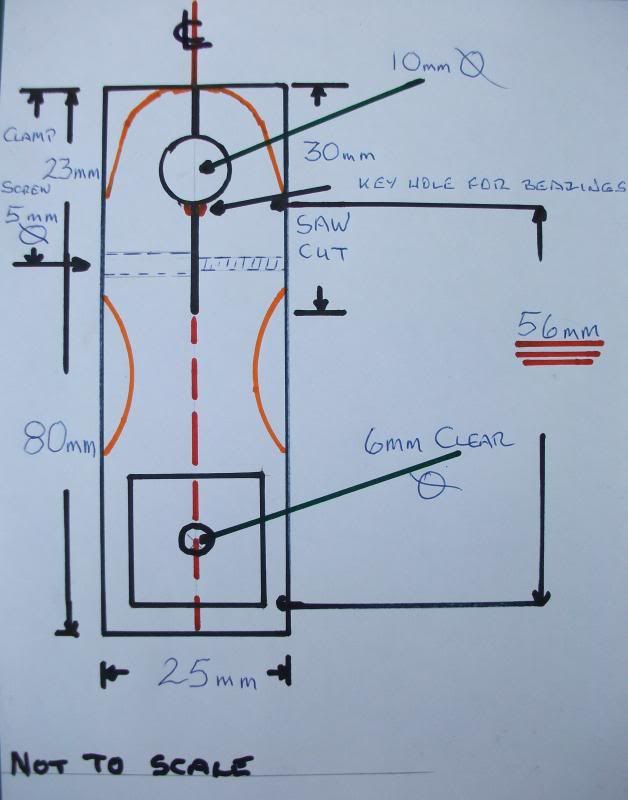
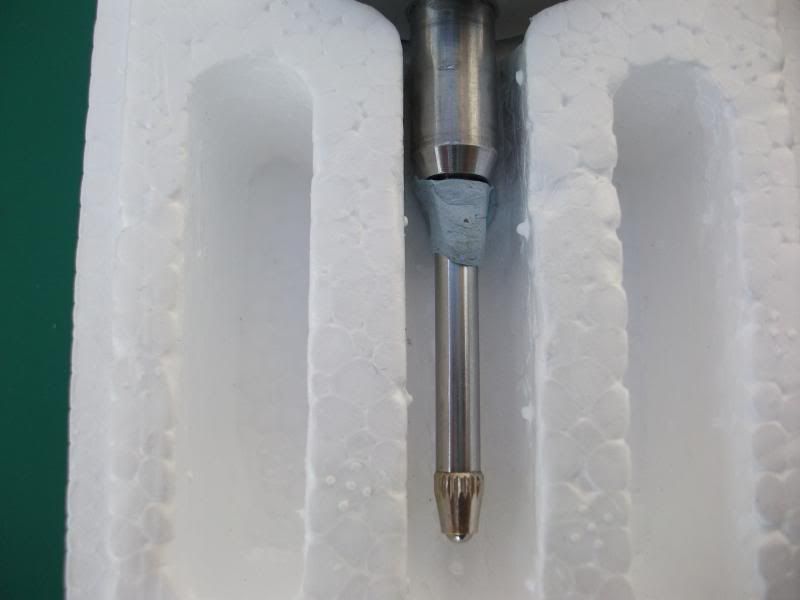
The stock of the gauge is the starting point because it has one of the only two critical dimensions in the whole making of this gauge. The critical measurement is the distance between the gauges arms and is set by the dial gauge so you will need to have your dial indicator to start. Now looking at your gauge there is the measuring plunger and directly above this is a round mounting boss/collar that will be clamped in the external gauge arm you will need to know what diameter it is because the ranges of dial indicators are standard but this boss/collar size is not from one manufacturer to another. With the boss/collar size noted we now establish the maximum distance between the gauge arms that the dial gauge plunger will reach. And of course be zeroed, in other words it is the point the plunger must always be able to reach and sit on the zero bearing point with the smaller barrel rod fitted. These measurements can be established completely by measurement but that is not the way we will do it, every measurement will be taken from the parts you hold in your hand, less chance to have a disaster that way.
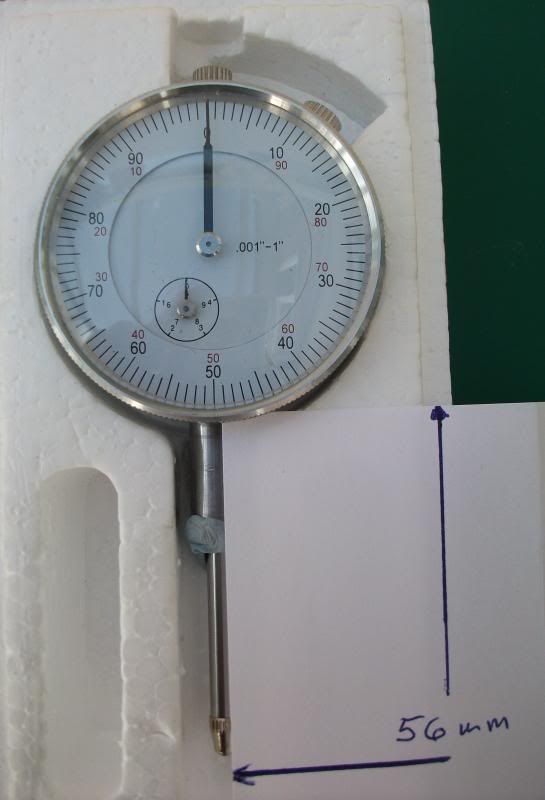
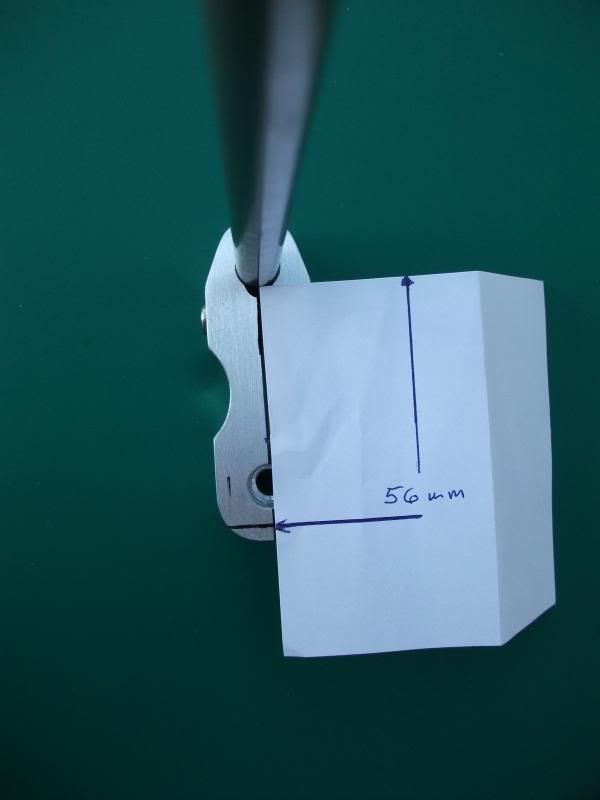
The easiest way to find the maximum distance of dial gauge travel you will need a piece of blue tack well that is what they call it here it is a blue tacky putty that can be used for hanging pictures etc on a wall but chewing gum will work admirably. Put the blue tack on the plunger shaft and gently push the plunger until the first zero point is reached on the dial that is both small and large hands are at �0� respectively. Now place a piece of paper between the bottom of the gauge housing and mark the end of the plunger on the paper my gauge distance was 56mm.
Now at this point I should say that I know we are suppose to speak the same language but I also know that descriptions somehow do not transfer across the pond to well so don�t guess if you do not understand just contact me by e-mail or via the site.
When you measure the distance that is the maximum distance the plunger is able reach under its own spring power. Just to make it clear that is the distance from the top of the limb that the dial gauge is mounted in to the bar that enters the barrel. Now I am intentionally ignoring the ball bearing that will eventually be fitted later which stands proud of the surface because I would rather have the distance a little too short than so long that the gauge plunger will not reach the bearing for zeroing.

Now we have the spacing measurement we can cut the gauge stock out of the aluminium block which is 25mm X 80mm X 20mm thick but extend each size by a couple of mm to allow for cleaning up etc next draw a centre line from top to bottom. The first hole to be drilled is the larger 10mm in the photograph positioned on the centre line 12 mm from the top surface, now this is the largest hole and the one more likely to drift while drilling also more likely to turn out over size which we do not want so we drill it with the next drill size below the finished hole size we want which was 9.5mm.
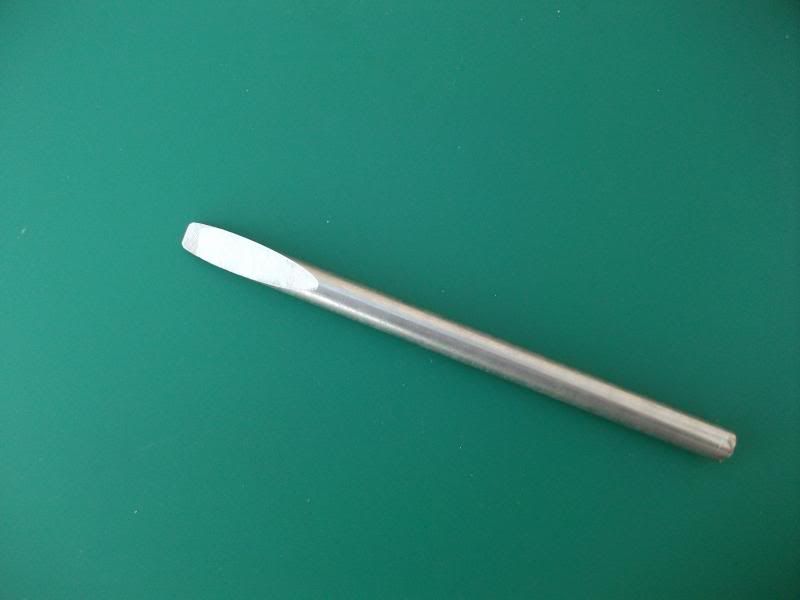
So now we are going to make a type of one time one use made on the job reamer once a tool room favourite rather than an expensive commercial offering out of the bar we will be using for the gauge limb its self, but you must remember it is not intended for removing large amounts of material. To make the reamer you take a 100 mm length from the steel that you intend to make the barrel limb out of and make a long sloping cut from one side to the other and then file the cut surface smooth in fact the smoother the better also it must have no burs on the sides. The reamer I made is in the photograph and to use it clamp the round section in a vice and lubricate it well and also the hole for aluminium I do prefer to use WD40 on aluminium you can sigh now!!!!!
Place the hole to be reamed to size on top of the reamer keeping it straight and as vertical as you can and turn slowly and try not to wobble while you are turning and applying a steady firm pressure, soon you will see after a couple of turns that it is removing fine shavings of aluminium, keep turning until the fully round section of the reamer passes through the hole the fitting should be a close fit indeed.
Next we determine where the opposite limb position is to be placed which is also positioned on the centre line. The opposite limb is made from 20mm square aluminium bar which the dial indicator is held in.
Now just to help and stop you getting lost place your reamer back in the hole you have made and then lay your piece of paper along the centre line touching the reamer and mark the aluminium (use pencil it comes off easier) where the end of your test dial plunger came to. You have now located the correct position for the other limb of the gauge that holds the dial indicator. Now the material for this limb is 20mm square its centre is 10 mm from each side so to position the mounting hole all you do is measure 10 mm from the line you have just transferred from the paper along the centre line towards your first hole and mark with a centre punch (a nail will work just as well). This hole is drilled clearance size for the 6mm screw. It was not until I started photographing parts for this gauge that I realised how bad the lens is in my digital camera is, I think I had better start saving for another!!