|
S |
M |
T |
W |
T |
F |
S |
|
|
|
|
1
|
2
|
3
|
4
|
|
5
|
6
|
7
|
8
|
9
|
10
|
11
|
|
12
|
13
|
14
|
15
|
16
|
17
|
18
|
|
19
|
20
|
21
|
22
|
23
|
24
|
25
|
|
26
|
27
|
28
|
29
|
30
|
31
|
|
|
|
Forums10
Topics40,261
Posts572,609
Members14,687
| |
Most Online32,084
Jun 14th, 2026
|
|
|
|
Joined: May 2011
Posts: 768 Likes: 3
Sidelock
|

Sidelock
Joined: May 2011
Posts: 768 Likes: 3 |
Old Colonel: Have you looked at the offerings by Ziegler ZP mounts, Betewe, and Clawmounts.com? Steve
|
|
|
|
|
Joined: Jul 2012
Posts: 5,072 Likes: 421
Sidelock
|
|
Sidelock
Joined: Jul 2012
Posts: 5,072 Likes: 421 |
Steve,
I didn't understand you had that type base,most use the plate, dovetailed to a base.My advice wouldn't work in your case.
New England Custom Guns,has mount parts from Recknagle and maybe Ernst Apel Wuerzburg (EAW).EAW has a system to change from claw mounts to swing mounts, while keeping the ability to return to the original.This does away with the problem of having to select a scope with straight tube or very high mounts.These companys have websites.
Mike
|
|
|
|
|
Joined: May 2011
Posts: 768 Likes: 3
Sidelock
|
|
Sidelock
Joined: May 2011
Posts: 768 Likes: 3 |
If anything had to be resoldered, it would definitely also be a temptation to go swing mount for many reasons! As to the configuration in question yet another reason for me to learn to post pictures, and avoid confusion...Steve
|
|
|
|
|
Joined: Jul 2012
Posts: 5,072 Likes: 421
Sidelock
|
|
Sidelock
Joined: Jul 2012
Posts: 5,072 Likes: 421 |
I haven't learned how either."old Dog etc."
Mike
|
|
|
|
|
Joined: Mar 2003
Posts: 122
Sidelock
|
|
Sidelock
Joined: Mar 2003
Posts: 122 |
I am enjoying this thread on claw mounts as I have been working on adding some rings to a drilling with claw bases for awhile now. I purchased a front ring base and plate and rear blank base from NECG. I removed the original front plate (it was dove tailed into the plate) and installed the new plate and base. I wanted to use the original front plate but after talking to NECG installing a new plate and mount seemed like the reasonable way to go. My next task was to file out the new blank rear mount base to the original rear plate. I used small files and smoke and tried to be patient and take my time. I have it pretty well fitted now and I am almost to the point of fitting the slider to a notch in the rear claw. My rear plate is a little different as there is only one slot. Basically I have three legs or claws instead of four which may make this process easier? So, now that I am about to create the notch for the slider this discussion came about (good timing) and I have read it and reread it several times and I want to make sure I understand Mike's comments as I'd like to get this done right. But I am not sure I completely understand what Mike is saying. So, I have some questions and possibly some photos if I can get the photos to post.
1. my rear plate has screws to hold the plate on but some drillings have a rear plate with no screws. Were the rear plates with no screws soldered onto the barrels? Did they normally use a soft (low temp) solder to do this? Can the soldered on plate be removed without damaging the solder on the ribs? If so how would this be done?
2. If I am understanding Mike correctly in his earlier post would the process for installing the new rear claw(s) be to first fit the new claws to the slot(s) in the original base using smoke and files. Then use the slider to mark where the notch or groove would be made in the rear claws? Make this notch very slightly proud or higher than the mark from the slider? Then file the bottom of the slider until it fits into the notch in the claws? I was just a little confused on this last step and wanted to make sure I understood the process. It seems like you have to use the slider to know or mark where to file the groove in the claw. Once the bottom of the groove is completed and left just slightly higher or proud of the slider do you then file the bottom of the slider to fit the groove?
Again, I appreciate the helpful information on this topic and it is great timing for me.
Thanks, Ron
|
|
|
|
|
Joined: Mar 2003
Posts: 122
Sidelock
|
|
Sidelock
Joined: Mar 2003
Posts: 122 |
Here are some photos of the claw mounts and bases on my Merkel drilling and the work in progress. Hope this works. First a sketch of my understanding of the process. 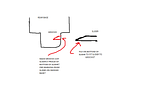 A photo of a drilling with a rear base that I believe is soldered on?? No screws so I guess it was soldered?  Some photos of the claw mounts I am working on.    A photo of the rear claw mounted on a 1" diameter steel bar used for fitting in the claw to the rear slot in the plate. 
Last edited by rfankhauser; 09/11/13 01:03 AM.
|
|
|
|
|
Joined: Mar 2003
Posts: 122
Sidelock
|
|
Sidelock
Joined: Mar 2003
Posts: 122 |
I think the sketch came out small so let me try again. 
|
|
|
|
|
Joined: May 2011
Posts: 768 Likes: 3
Sidelock
|
|
Sidelock
Joined: May 2011
Posts: 768 Likes: 3 |
Ron, your screw on mount looks similar in many ways to that on Old Colonel's DR, with the exception of one claw. The claw is wider. Make use of all the room below and to the sides to keep it as beefy as you can. The depression beneath the base is curved, ostensibly to allow the front of the claw to be beveled in order to snap down past the beveled front of the slider. I personally don't like that feature in that I like to keep the hook as stout as possible (having had one fail when shooting a slug--bending one hook to the breaking point), but that is just me. There is so often so precious little metal left beneath the slider in the first place! And some gunsmiths even want that to be specially hardened. I believe Kreighoff made the single hook rear mounts for a while. POLISH to final fit, or polishing at all may remove more metal than you want. Take as long as you need to get it perfect. Tight is everything. Good luck...Steve
|
|
|
|
|
Joined: Jul 2012
Posts: 5,072 Likes: 421
Sidelock
|
|
Sidelock
Joined: Jul 2012
Posts: 5,072 Likes: 421 |
rfrankhauser,
I stood shoulder to shoulder with Fred Schagelmilch(sp)in Walter Grass's shop and watched him mount many scopes, mounting a couple of my own with a really lot of help from him and Walter. We used new parts, but I will try to walk you through their process, but accounting for your parts as best I can.But first, I will answer your question about the rear base w/o screws.Yes,they are soldered on. Walter and Fred used soft solder paste(solder and flux mixed in paste form)and filled with wire solder if needed.The original rib had to be cut out,Fred used a small saw and a capeing chisel to reach the areas between the barrels.Once cut, the ribs were wired up with blocks to keep them from comming loose.Once the rib sections were removed(BTW don't forget to remove the rod that activates the rear sight)the bases were fitted by scraping and spotting( they used Prussian Blue mixed with common oil and a flux brush, but any spotting agent will work).The bases were soldered in(slider and springs removed from rear base),and "skim milled" on top surfaces, including dovetail,to make them parallel to the barrel flats.After this is where your work comes in.The plate is fitted to the hooks when it is delivered, but since they were forced together, sometimes a little bit of metal is rolled up on the side of the hooks, which is cleaned off with a scraper.The front ring is installed (to make it easier,assume split rings) and the scope is installed in the front ring(center and level the reticle) and boresighted with an adjustable block( a small steel block with a screw in the top)under the scope at the rear base, held together with a chord.Boresighting at a hundred yards or so, by adjusting the screw up or down will show the needed height of the rear ring, from the bottom of the scope to the top of the base.This height is transfered to the ring with a caliper or other convienent way, and the feet are are extended to this scribed line by milling(or fileing in your case).The needed length of the rear feet(foot, in your case)is found by measuring with a caliper, milled to length, and filed to fit the approximate contour of the barrels.Once it is fitted to the base,the feet are marked to locate the slot for the slider,by scribing a line through the slot in the base(at the bottom of the slot).The slot in the feet is milled with a specially shaped cutter(can be carefully done with saw and files), so that the scribe line remains(barely).Then the slider is fit to the feet as described before.Your drawing seems to show a wedge shape, unless you have already done it, don't file the slider to a wedge, make it more or less parallel, with a break on the leading edge to start it into the slot. It should be fit pretty"hard" to prevent "play".The rear of the feet are filed on an angle to provide a "cam" to move the slider backward when installing the scope.Then everything is polished,top of bases engraved, and blued. To make it simple, this description was for bases w/o windage, the differences for bases w/windage adjustment would be pretty much self evident. I know this is confusing, if you have a question, I or someone else will answer it.
Mike
Last edited by Der Ami; 09/11/13 04:51 PM.
|
|
|
|
|
Joined: May 2011
Posts: 768 Likes: 3
Sidelock
|
|
Sidelock
Joined: May 2011
Posts: 768 Likes: 3 |
Ron, I have used a magnifying glass and still can't read what is below you illustration, but I think I get your gist.
|
|
|
|
|
